Contents (hide)
1. Mise à jour du firmware
IMPORTANT : Le Wemos Motor Shield a un gros bogue et brique parfois. Il faut mettre à jour le firmware du Motor Shield pour régler ce problème. Suivre les instructions sur la page suivante, malheureusement, seulement pour Windows : https://github.com/thomasfredericks/wemos_motor_shield
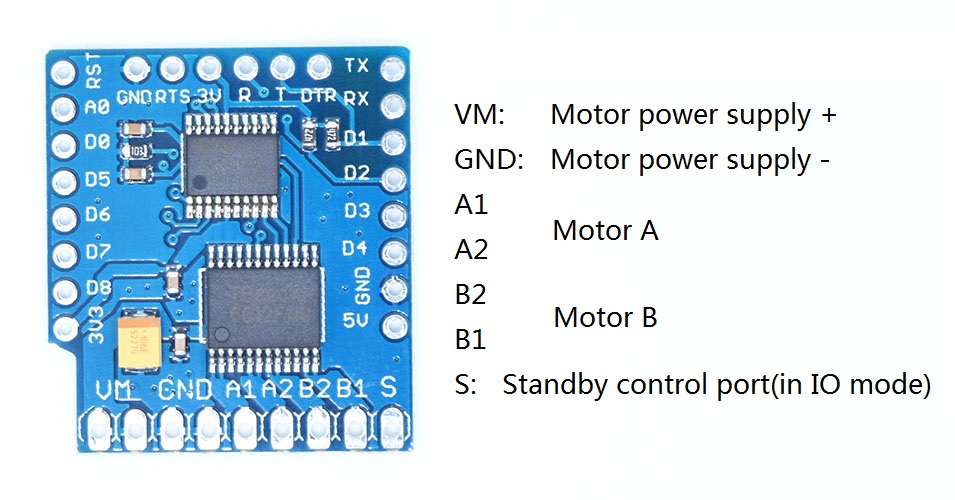
2. Brochage

3. Logithèque et utilisation
Le Wemos D1 Motor Shield est contrôlé par I2C. Pour simplifier son utilisation, suivre les instructions suivantes :
| Télécharger la logithèque wemos_motor_shield : https://github.com/thomasfredericks/wemos_motor_shield | |
 | Importer la logithèque dans Arduino |
 | Ouvrir un exemple |
4. Utilisation avec la Plateforme de robot «2WD chassis»
4.1 Préparer les éléments
 | Avec le multimètre en mode voltmètre et avec les 4 batteries insérées, trouver le fil positif(+) et négatif(-) du porte-batterie |
 | Identifier le fil positif(+) et négatif(-) du porte-batterie |
 | Souder des rallonges femelles au porte-batterie |
 | Trouver le moteur et deux fils avec des bouts femelles |
 | Souder des rallonges femelles au moteur |
| Répéter pour le deuxième moteur |
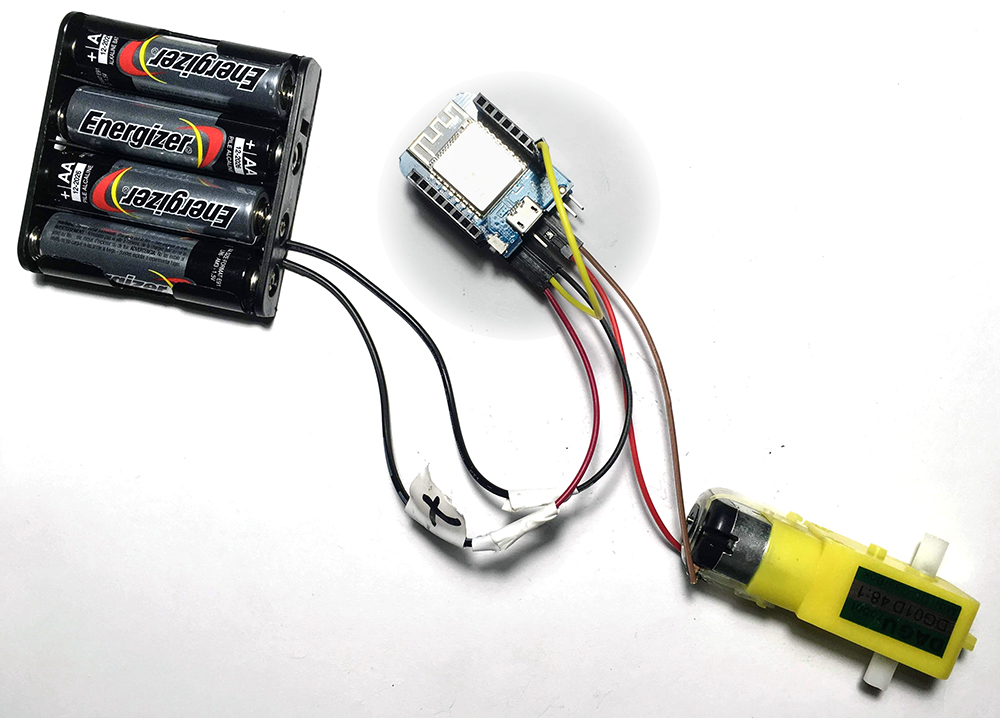
4.2 Branchement si le Wemos est relié à l'ordinateur

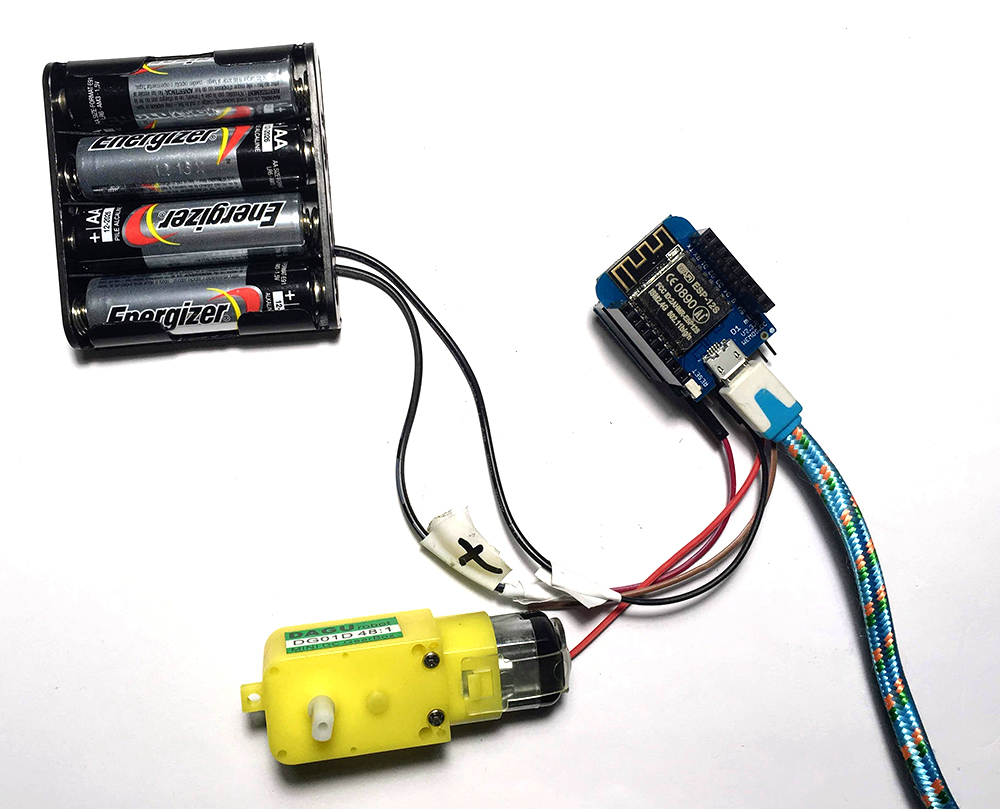
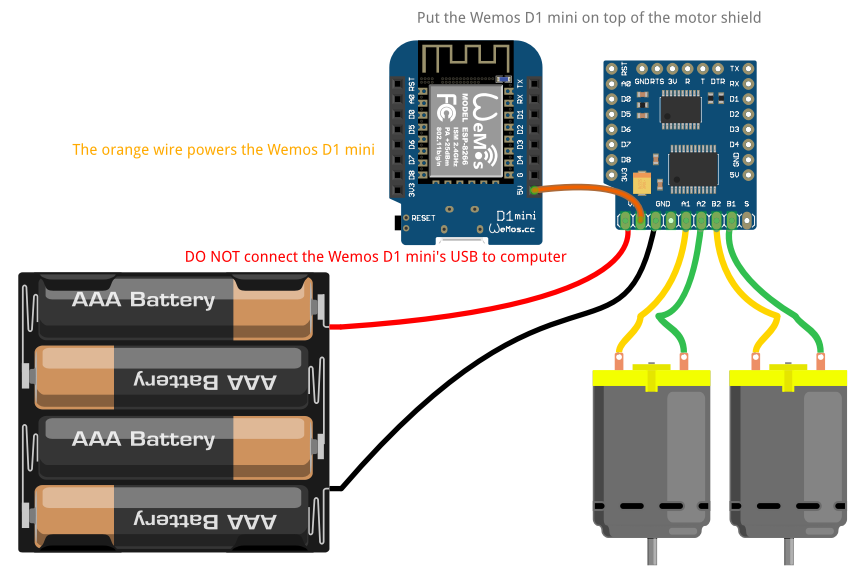
4.3 Branchement si le Wemos est autonome
4.4 Code de démonstration
#include <Wire.h>


#include "WEMOS_Motor.h"


//Motor shield default I2C Address: 0x30
//PWM frequency: 1000Hz(1kHz)
Motor M1(0x30, _MOTOR_A, 1000); //Motor A
Motor M2(0x30, _MOTOR_B, 1000); //Motor B


void setup() {


        Serial.begin(57600);
        Serial.println("Starting demo");


}

void loop() {

        int pwm;

        Serial.println("for (pwm = 0; pwm <= 100; pwm++) { M1.setmotor( _CW, pwm); M2.setmotor(_CW, 100-pwm); }");
        for (pwm = 0; pwm <= 100; pwm++)
        {
                M1.setmotor( _CW, pwm);
                M2.setmotor(_CW, 100 - pwm);
                delay(100);
        }

        Serial.println("Motor STOP");
        M1.setmotor(_STOP);
        M2.setmotor( _STOP);

        delay(1000);

        Serial.println("for (pwm = 0; pwm <= 100; pwm++) { M1.setmotor(_CCW, pwm); M2.setmotor(_CCW, 100-pwm); }");
        for (pwm = 0; pwm <= 100; pwm++)
        {
                M1.setmotor(_CCW, pwm);
                M2.setmotor(_CCW, 100 - pwm);
                delay(100);

        }

        Serial.println("Motor STOP");
        M1.setmotor(_STOP);
        M2.setmotor( _STOP);
        delay(1000);


        Serial.println("Motor A&B SHORT BRAKE");
        M1.setmotor(_SHORT_BRAKE);
        M2.setmotor( _SHORT_BRAKE);
        delay(1000);

        Serial.println("Motor A&B STANDBY");
        M1.setmotor(_STANDBY);
        M2.setmotor( _STANDBY);
        delay(1000);

}